Queue Monitor Variables
Variables can be added to queues in the eFORMz Director, using the Add File Selector. Once added, they can be used to pass information to an eFORMz project.
Example: Configuring an Email
To follow along, download the example files here:
For more information on these files, view the following: https://minisoft.com/support/index.php/director-alerts/
To add or edit Queue Monitor variables:
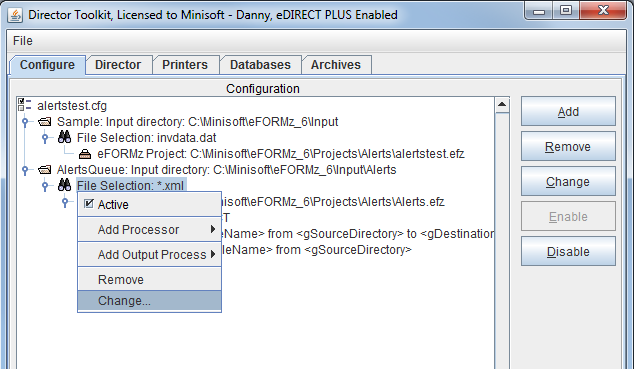
1. In the Director Toolkit, right-click the File Selection and select Change, or select the Change button to the right of the Configuration field.
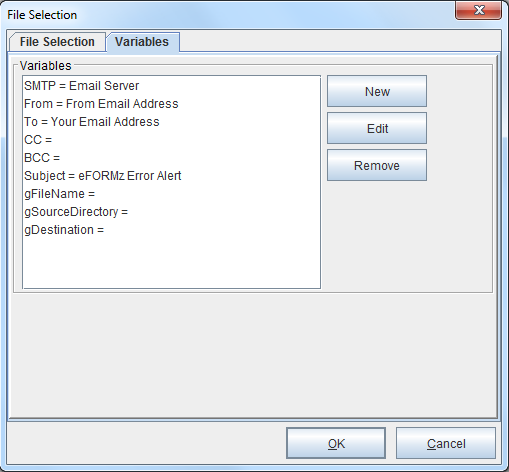
2. Switch to the Variables tab. Various Queue Monitor variables will have been configured.
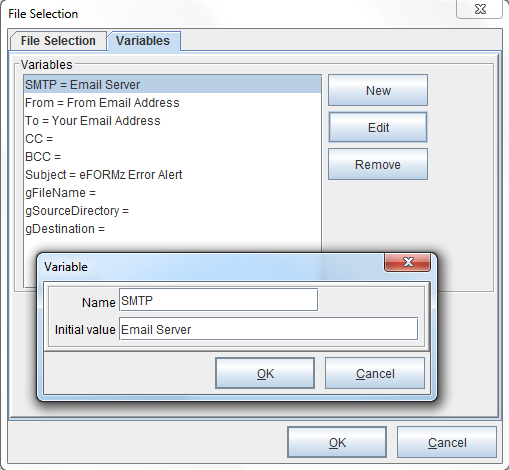
3. Right-click one of the variables and select the Edit button. The Variable dialog will display. You can change the Name and the value of the Initial Value of the variable.
Note: To add a new Queue Monitor variable, select the New button.
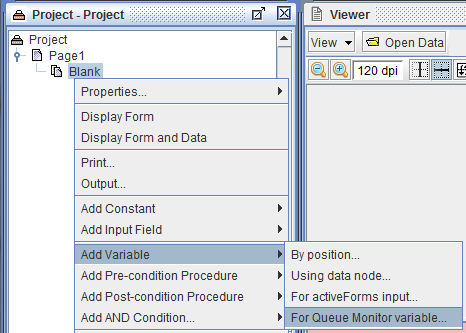
4. Next, the Queue Monitor variable needs to be added to an eFORMz project (.efz) from the eFORMz Composer. Right-click the form and select Add Variable > For Queue Monitor variable.
Note: the Queue Monitor variables are already configured in the Alerts.efz project, available in the sample files: https://minisoft.com/support/wp-content/uploads/2015/04/Alerts.zip
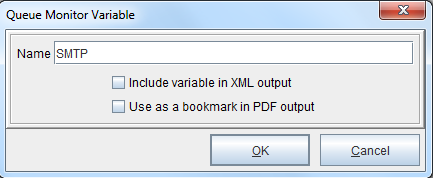
5. The Queue Monitor Variable dialog box will display. Enter the same name that was used for the Queue Monitor variable in the Director Toolkit.
Note: The names of Queue Monitor variables in the Composer and the Director Toolkit must match.
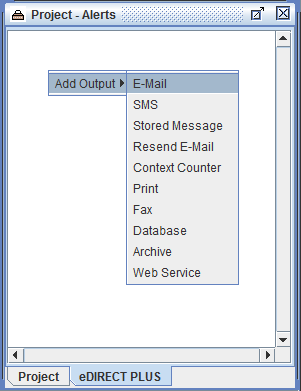
6. Switch to the eDIRECT PLUS tab from the Project window, right-click, and select Add Output > E-Mail.
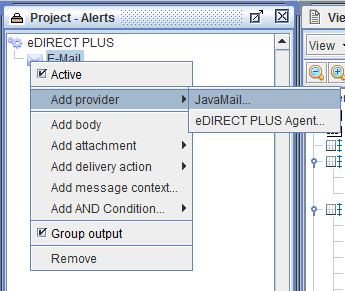
7. Right-click the E-Mail icon and select Add Provider > JavaMail.
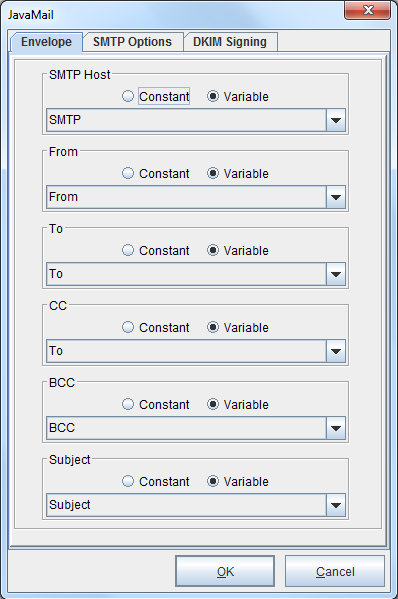
8. Fill in the fields with the variables created in steps 4 and 5, which should match the Queue Monitor variables created in the Director Toolkit. Select OK.
Note: To test the email, select Run > Process w/eDIRECT PLUS from the eFORMz Main Menu. More details can be found here: https://minisoft.com/support/index.php/sending-an-html-email/

