LPD Communication
The following steps enable LPD communication to send print jobs from a non-Windows server (HPe3000, AS400, Unix) to a Windows system, where the eFORMz merge process takes place.
STEP 1: Enable TCP/IP Print Server for LPD Communication
Windows 10
From the Start menu:
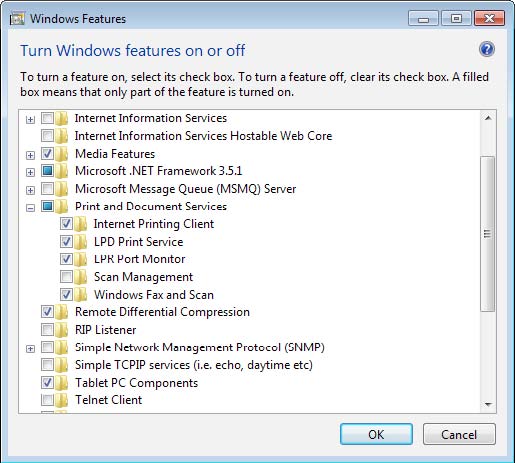
1. Enable the LPR Monitor in Windows Features by navigating to Start > Control Panel > Programs > Programs and Features > “Turn Windows Features on or off.” Navigate to Print and Document Services, expand the menu and check the LPR Port Monitor box.
Windows Server 2008 and higher
From Server Manager:
1. Click on Add Roles.
2. Select Print and Document Services.
3. Add LPD Services.
If the LPD setup through the Standard TCP/IP Port is blocked by Active Directory, consult eFORMz Print from Windows Server to Network Printer.
If your system gives a message that it requires administrative authority, complete the following steps instead:
- Open a Command Prompt window as Administrator.
- Run the following command:
dism /online /enable-feature /all /featurename:Printing-LPDPrintService
- Close the Command Prompt window.
STEP 2: Start the TCP/IP Print Server Service
Confirm that the TCP/IP Print Server Service is started:
1. From your Windows Control Panel select Administrative Tools.
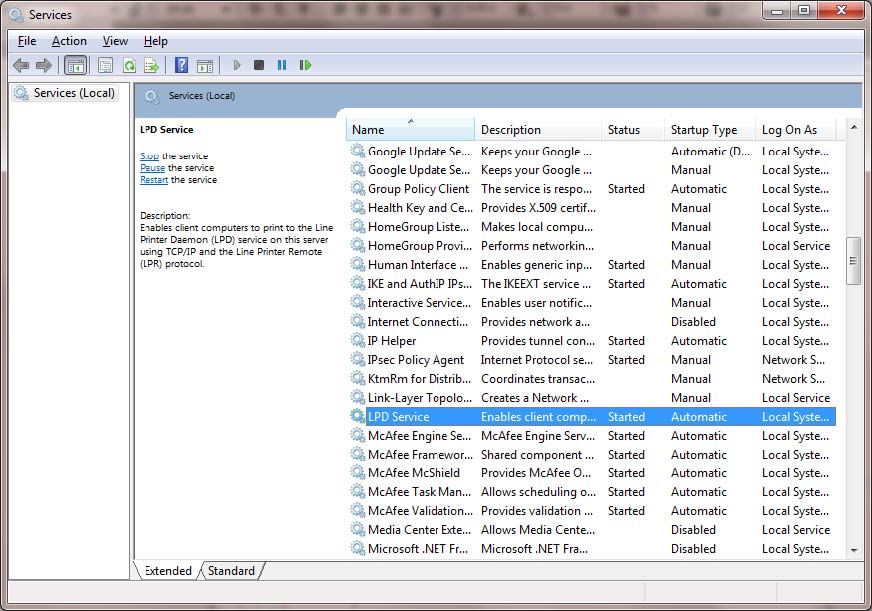
2. Select Services. A listing of all services running on your Windows platform will display. Select LPD Services.
3. Start LPD Services if not started already and select Automatic as the Startup Type.
STEP 3: Configure the eFORMz Port Monitor
To capture incoming print files (or spool files) from a non-Windows server to a directory on your Windows operating system, view the following tutorial.
Deprecation notice: Microsoft announced that the LPD Service was deprecated starting in Windows Server 2012 R2. The service is still available in Windows Server 2016 and Windows Server 2019.
