
Director Setup for Windows
Printer Configuration
Configuring the Process
Configuring the Project Selection
Submitting the Automated Process
Automating the Director on Windows
Use the Director Toolkit to configure automated processes. You can set up one or more configurations for the Director to monitor. To set up the automation process, you must determine which source files are required and how to handle them. Use the Director Toolkit to configure and control the process.
Start the Director Toolkit with one of the following methods:
- From your Windows desktop, select the Director Toolkit shortcut icon.
- From eFORMz Composer, click Host Tools > Local Director Toolkit.
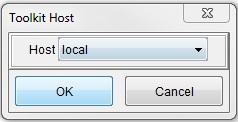
- From the Windows Start menu, select All Programs > eFORMz 10 > Management > Director > Director Toolkit. After Director has started, select a Host type of Local and click OK:
Printer Configuration
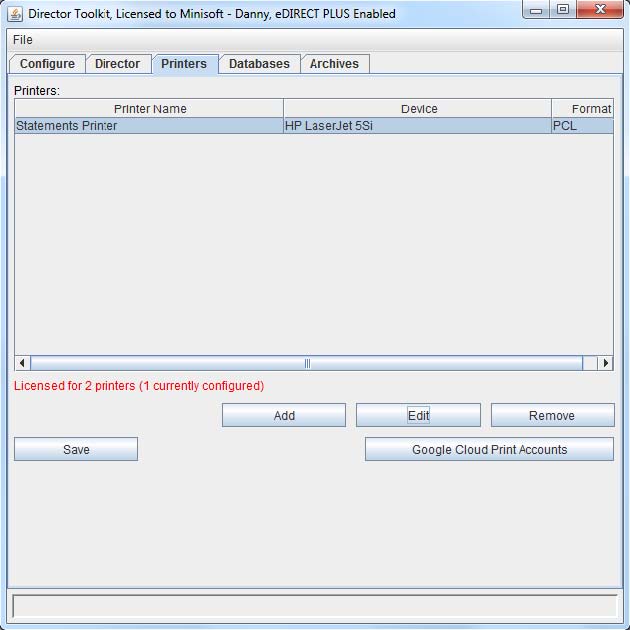
After the Director Toolkit starts, click Printers and configure your network printers to use. You must complete this configuration step for each printer you want to specify on the Configure page. Before you proceed, make sure your printer is listed in Window’s Devices and Printers list of installed printers.

To configure a new printer:
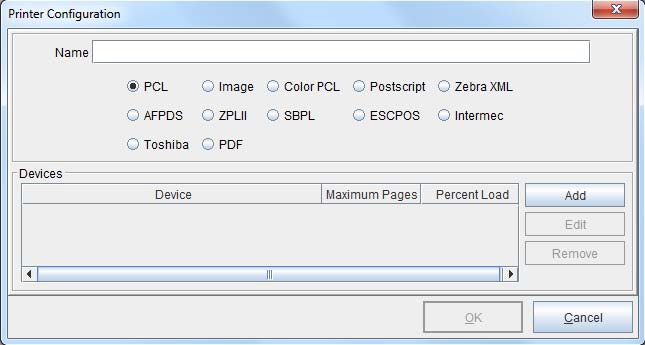
- From the Printers configuration tab select Add to open the Printer Configuration window.
- Type a name for the configuration. Devices lets you add multiple devices to this named configuration, which is sometimes used with pooling several printers under one configuration.
- Click Add again:
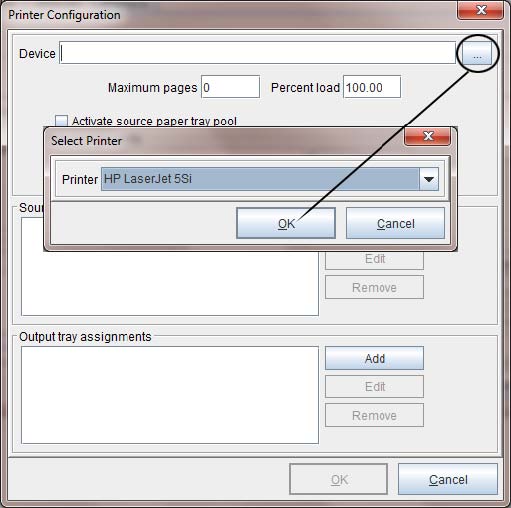
- Select the ellipses button (…), select a printer, and click OK twice. If the printer you want is not listed, it might not be installed in Window’s Devices and Printers, or the Director might not be able to work with that printer. The Director runs a service, and not all printers can operate through service directives.Your eFORMz Printer License Purchase Agreement specifies the number of printers that you can add. The default is two printers. Contact Minisoft Sales at sales@minisoft.com or 800-682-0200 if you require more printers to be added to your license.
- The selected printer is listed in Devices from the Printer Configuration window. Click OK. The printer is shown in the list of printers.
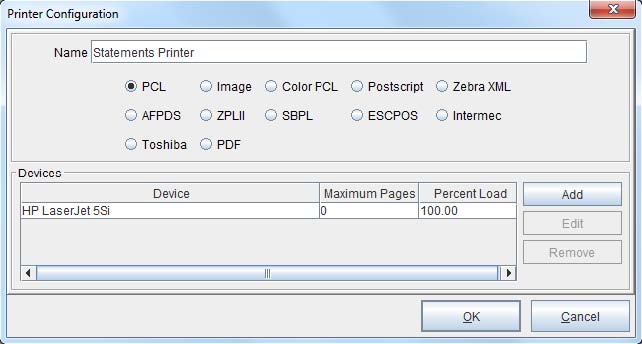
- Click Save after you add the printers you require:
Printer configurations are stored in C:\Minisoft\eFORMz_6\Printer.xml.
Configuring the Process
When the Director Toolkit is initially started you will notice on the Configure tab a preset Input Directory configured:
C:\Minisoft\eFORMz_6\Input
The Input Directory is the directory by which your source print file or data files will reside and be pulled to be merged with an eFORMz project. Available options include:
• Local directory
• Remote directory
• Local iSeries queue (AS400 only)
• Remote iSeries queue
• MQ message queue
For a full description of each input directory type, see Source Directory. For the purpose of this documentation we will focus on using the Local Directory option.
Input Directory
To edit the options of the Input Directory:
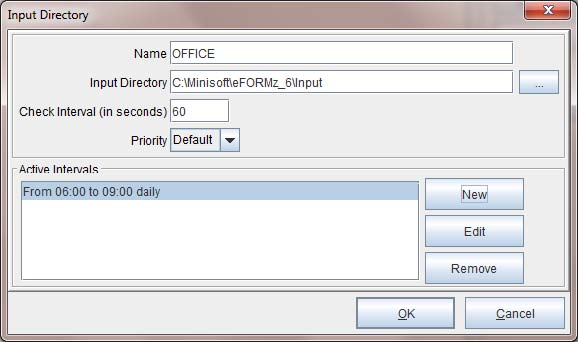
1. Right click the Input Directory and select Change:

2. The Input Directory dialog box will display:

Tip: If the eFORMz Director will be monitoring for files or sending files across a network, you must use UNC paths. For example:
\\ServerName\minisoft\eFORMz_6\Input\
Asterisk (*) or question mark (?) can also be used as wild card entries in the source Input Directory.
Note: Each Input queue is processed in a separate thread. Creating multiple queues implements multi-threading.
3. Once you have your Input Directory configured, if necessary, set other available options:
Name a descriptive title assigned to an input directory to better identify the selection location of print files to be processed by eFORMz.
Check Interval indicates the number of seconds the Queue Monitor will wait before checking the input directory for new print files.
Priority sets the priority setting for the individual input directories. Each input queue executes a queue monitor in a separate thread. Control the execution priority of each thread individually based on the priority. The higher the priority (1-10) the more execution time is given to a thread in relation to other threads and processes.
Process input files serially default unchecked. Unchecked, a file will be selected and then each File Selection will be processed against the file. Checked, each File Selection goes through all the files before going to the next File Selection.
Active Intervals sets timed interval checks on the Input Directory. Timed intervals can be set based on the day and time of week.
4. Once complete, click OK.
5. Next, right click the Input Directory field and select Add File Selector:
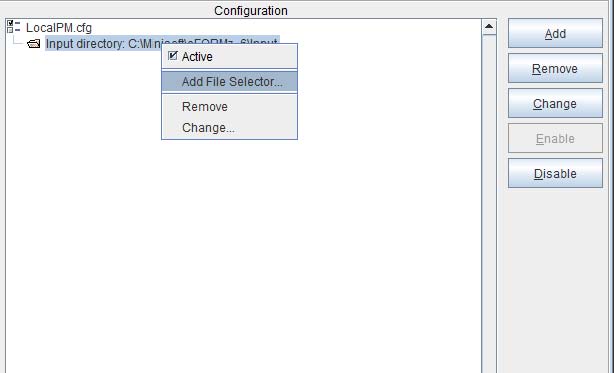
Each Input Directory can have multiple file selections if an input directory contains multiple file types or naming conventions for an array of files.
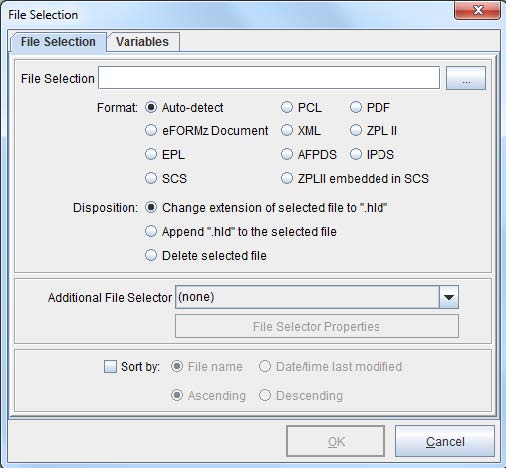
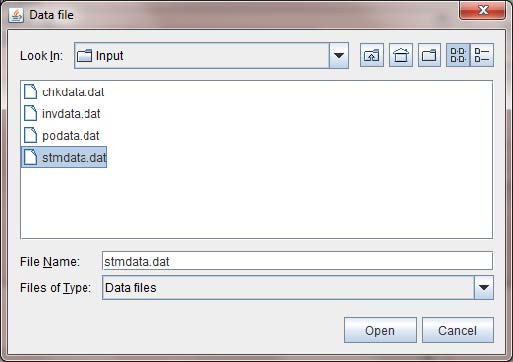
6. From the File Selection dialog box use the browse button to select a print file to be merged with an eFORMz project from the input directory:
7. From the input directory folder select the print file to be merged with an eFORMz project file and click Open from the Data File dialog box:
8. The File Selection field will now display with the specified print file to be merged with an eFORMz project.
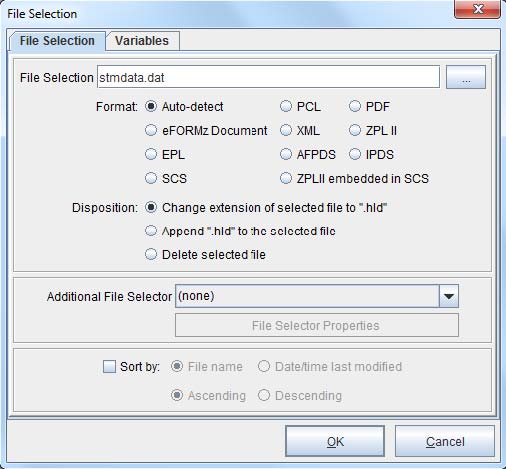
File Disposition Options:
• If you would like the print file to remain in the input directory after a merge has taken place, select Change extension of selection file to “.hld”.
• If you would like the print file to maintain its original extension select Append “.hld” to the selected file. This will cause the .hld to append to the end of the original extension.
• If you would like to delete the print file from the input directory after a merge has taken place, select Delete selected file.
Note: Files specified in the Files Selection are verified by eFORMz as ready for processing. Files in a writing state will not be picked up by eFORMz until the file is ready for processing.
Tip: An asterisk (*) or question mark (?) can also be used as wild card entry in the source print file name. For example:
stmdata*.dat stm??12*.dat ???data.*
The ‘File Selection’ option also allows for multiple file selection criteria.
The delimiter between each file selection can be a space, comma, plus, or minus. If the delimiter is a space, comma, or plus the next file selection goes in an ‘include’ list. If the delimiter is a minus, the next file selection goes in an ‘exclude’ list. A data file must match one of the selections in the include list and not match any of the selections in the exclude list to be processed. For example:
File select = PO*.DAT - PO1.DAT - PO2.DAT
PO01*.DAT + PO?1*.DAT - PO2*.DAT
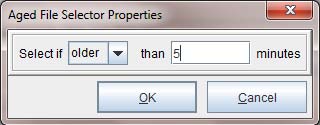
9. (Optional) Add additional file selectors. If using the File Age Selector, the most likely uses would be to clean up files older than a specific interval or delay processing for a specific interval in order for something else to process first.
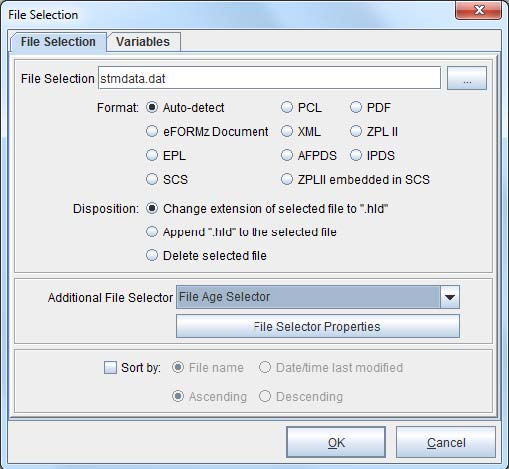
Once you have selected an Additional File Selector option you can then set the properties for the selector using the File Selector Properties.
10. (Optional) A Director variable can be added and be accessible from a project by using an xml node of:
QMVariables/
Example:
QMVariables/Month
If the data file is an xml file the value will come from an xml noted named:
/QMVariable/
Example:
Statements/QMVariables/Month

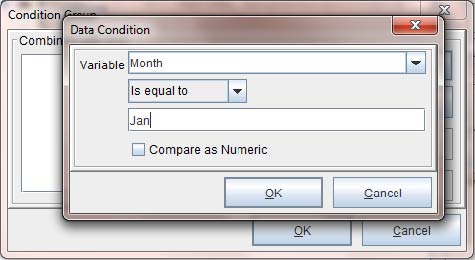
Variables in the Director Toolkit can be used for convenience when setting up conditions on projects. For example, lets say you have one project that sets a global variable to be passed back to the queue monitor. Then you want to use that variable in a condition on another project to determine whether to execute that project or not. When setting up the condition within the Process with eFORMz dialog box:
The combo boxes for variables in the dialogs will be filled with the list of variables defined in the file selection. By naming all the variables in the file selection, you can just select them when setting up the project conditions, rather than typing the variable name in:
11. Once complete, select OK and your file selection will appear in the Director configuration.
Configuring the Project Selection
Once a file selection has been completed the next step is to decide what will occur with this source file. In the example below we will configure the data file to be merged with and eFORMz project file:
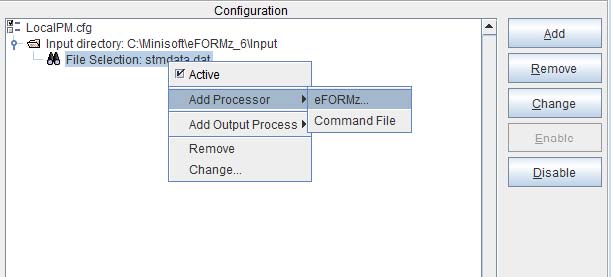
1. Right click the file selection field and select Add Processor > eFORMz to specify a project to be merged with your file selection:
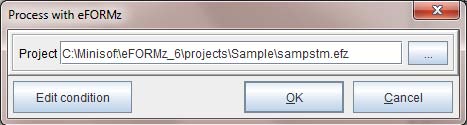
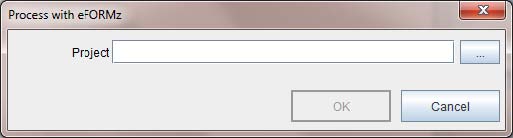
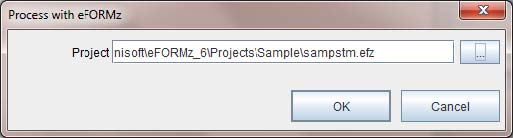
2. From the Process with eFORMz dialog box use the browse button (…) to select the project file you would like your file selection to be merged with:
3. Once the project file has been located using the Project dialog box click Open.
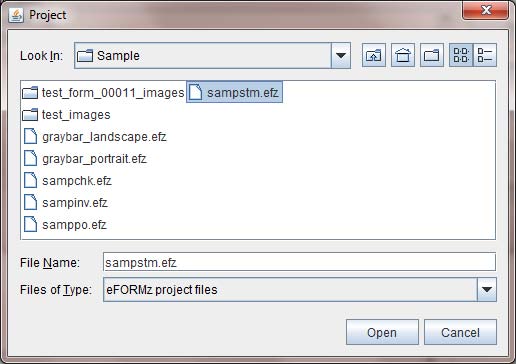
4. The project and project path will appear in the Project field. Click OK.
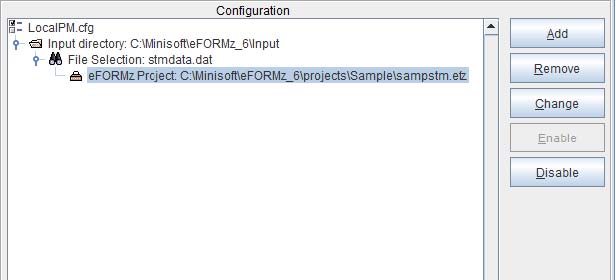
5. The Project selected will then appear under the File Section.
Feature: eFORMz Project Reference File ( .efr ) allows one to perform “tableformatted’ lookups on project names based on the name of the print file. For example:
efr text file:
<ProjectReference>
<Ref Datafile=”P2310201_*”Project=”/minisoft/projects/sampstm.efz” />
<Ref Datafile=”P5310201_*”Project=”/minisoft/projects/sampstm_d2.efz” />
</ProjectReference>
Toolkit Project File reference:
/minisoft/projects/projectable.efr
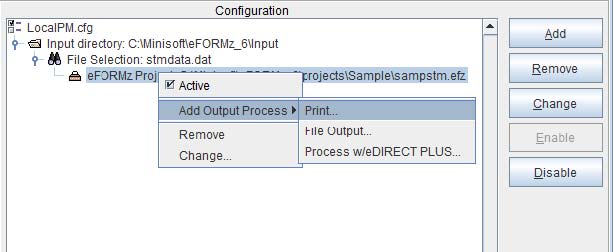
6. Right click the eFORMz Project field and select Add Output Process, select:
Print
File Output
Process w/eDIRECT or eDIRECT+

Selecting the Output Options
As a source file is being picked up to be merged with an eFORMz Project a decision must be made as to what you would like to do with the merged output. The following Output options are available:
Allows you to select the printer you would like to print your output to. Select the browse button to select a printer from the printer list.

File Output
Implements the Output to a File dialog box. Use the browse icon to locate the directory you would like the file output to be placed. The output file name can either match a
pre-defined variable or a static naming convention. Output file name variables include:
<directory> , <datafilename>, <datafileext>, <project>
Example:
C:\outputdirectory\.pdf
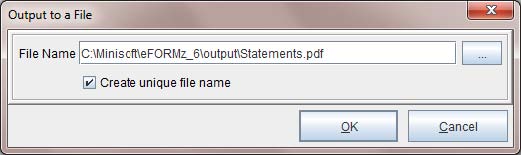
Creates a unique file output name every time a process is ran. The unique file name must contain at least 3 characters. For example:
invoice_{system date/time stamp}.pdf
Unchecked causes the output file name to consistently remain the same for every time a process is run. For example:
invoice.pdf
Process with eDIRECT(+)
Implements the eDIRECT Process if a project file has been configured for eDIRECT. The Base Directory represents the directory where you would like your output to reside. eDIRECT by default creates sub directories under the base directory for the standard output. If you do not wish the subdirectories to be built, select Disable standard subdirectories.
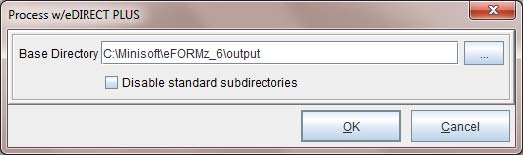
Note: Unless disable option is checked, new subfolders are automatically created under the base directory for each eDIRECT output process:
email – /email
print – /print
fax – /fax
(Optional) Post Processing
Each output process can also have multiple post processing commands:
Print Files
Copy Files
Delete Files
External Commands
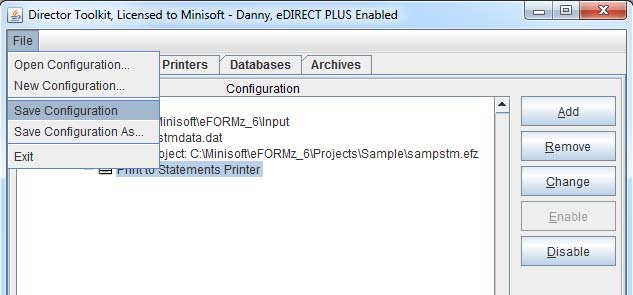
Save your Configuration
Once your configuration file is complete, save your changes by selecting File > Save Configuration.
Submitting the Automated Process
1. Select the Director tab:
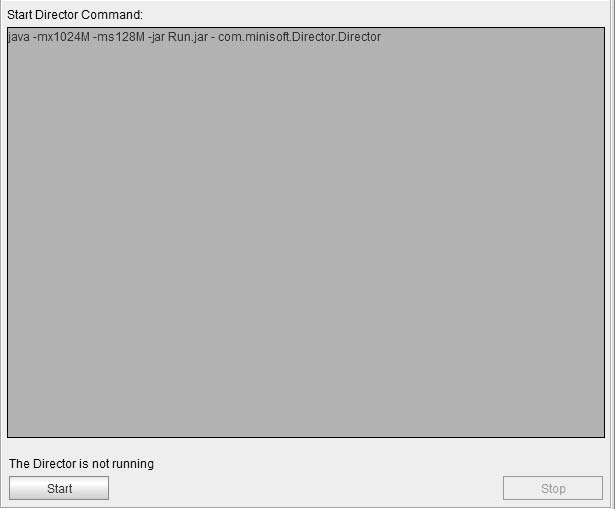
2. From the Director select Start.
Start Job – Submits the job.
Stop Job – Stops the Director process.
3. The Director will startup displaying the active configuration file.
4. The Director tab contains multiple levels in which each level contains a function to control the Director as it is monitoring:
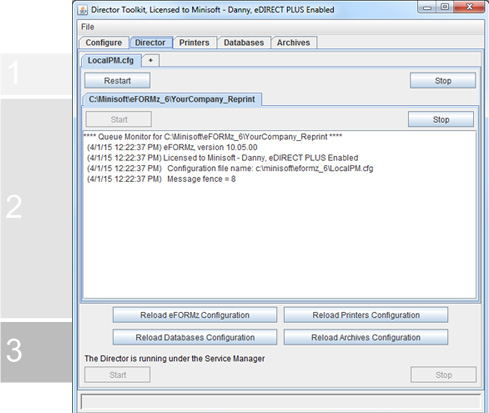
(Level 1) Controls the Restart or Stop of a Configuration file that has been setup to monitor specific queues. If the Director is setup to run multiple configuration files, each configuration file can be restarted or stopped individually. By default, a restart would occur if changes to your configuration have occurred and you would like to have those changes implemented. Selecting Stop will cause the Director to no longer monitor the specified configuration file.
(Level 2) Controls the Stopping or Starting of a Queue that is being monitored by the configuration file. Note, a Queue can be inactive within the Configure tab but can be started or stopped from the Directors tab if wanted.
(Level 3) Controls the Director as a whole. You can Stop/Start the Director using the stop and start buttons. Once you stop the Director you will need to resubmit the job. Reload eFORMz Configuration allows you to reload the eFORMz_cfg_User.xml if any changes were made to this file externally without having to stop and restart the service. Reload Printers Configuration allows you to reload the Printers.xml file if changes have been made without having to stop and restart the service.
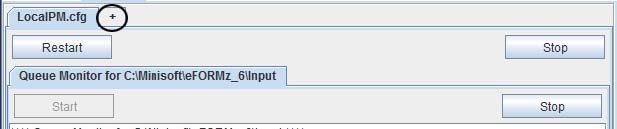
The Director can also monitor multiple configuration files in a single job process. To add another configuration file to the job process:
1. Select the ( + ) located beside the existing configuration tab:
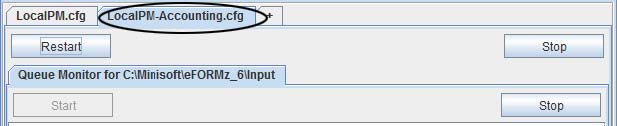
2. Use the browse button (…) on the Configuration file field to select another configuration file:

3. Once selected, Start the configuration:

4. Your configuration will appear under the Director tab.
Automating the Director on Windows
1. Open a run box by pressing the Windows logo ![]() key+R.
key+R.
2. Type cmd.exe and press return.

3. From the command prompt, check to see if your machine is running Java 1.8 or higher by entering the following:
Java -version
If the command prompt returns an instance of Java running on the machine (1.8 or higher), then move to step 4. If it doesn’t, install Java: http://www.java.com/en/download/manual.jsp
4. Under Start > Programs > eFORMz > Windows Services, select either Service Manager – Create or Service Manager (64-bit) – Create.
NOTE: To check if you’re running 32-bit or 64-bit Windows visit the following link: http://windows.microsoft.com/en-us/windows/which-operating-system
Video Tutorial
![]()
![]()